This page summarises the most important information on observing aurora in Germany. Further questions are answered via the contact form or in the AKM forum (German).
Observing aurora in Germany
The right time
There is no one hundred percent forecast for aurora. There are, however, reliable indications. The location also matters. In the north of Germany the chances are considerably better than in the south. An observation is particularly promising in case of:
- An alert via the aurora warning list or the Telegram channels Polarlicht Vorhersage and AuroraAlarm.
- The expected arrival of a CME that is already being discussed in the AKM forum.
- Reports of successful sightings by other observers.
- A Bz value that has been below −10 nT for more than an hour. This is the most important sign.
- Clear deflections of the magnetometers in Scandinavia and Germany.
A clear sky is always required. Aurora glows at an altitude of 100 to 400 kilometres. It cannot be seen through clouds. A bright Moon makes observing harder, but not impossible. Aurora can occur all night long. It often occurs in bursts, the substorms. They usually last only 15 to 30 minutes. A longer observing period therefore increases the chance of success.
The aurora archive shows how past aurorae developed, with times, brightness and measurements of all known sightings in Germany.
The right location
The most important thing is a dark location with a free view to the north. As with all astronomical observations: the less artificial light, the better. Rural areas north of cities are well suited. The coasts of the North Sea and the Baltic Sea are ideal. There is hardly any light pollution to the north, and the air over the sea is often particularly clear. Inland, hills are better than valleys. There is less fog and the view to the horizon is free.
The light pollution map shows suitable dark locations.
The viewing direction
From Germany, the aurora of the northern polar region is visible. The most important viewing direction is therefore north. Most aurorae appear as a glow above the northern horizon. During strong storms the aurora rises up to the zenith and sometimes even to the south.
North is easy to determine. Extending the line between the two rear stars of the Big Dipper by about five times leads to the Pole Star. It is always in the north. Wikipedia provides detailed instructions.
During very strong storms, the sky at the zenith and to the south should also be observed. Special forms such as red SAR arcs or pulsating green patches sometimes appear there. More information is provided on the page Special types of aurora.
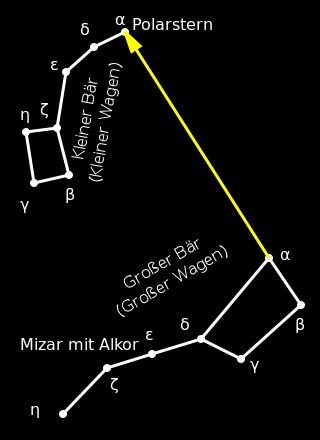
The Pole Star can be found with the help of the Big Dipper.
The appearance
Cameras and smartphones capture considerably more than the human eye. Often only the photo reveals the colours and rays that could not be seen with the naked eye. To the eye, faint aurora appears as a grey or whitish glow above the northern horizon. Vertical rays that slowly move sideways are sometimes visible. Strong aurora shows green arcs and red veils with bright rays.
The intense colours of many photos are usually not visible to the naked eye. At night the eye hardly perceives colours, since the rods of the retina are colour blind. Only very bright aurora appears clearly red or green to the eye.
Dark adaptation is important. The eyes need 20 to 30 minutes to get used to the darkness. Even a brief look at a bright display or into car headlights cancels this adaptation. Displays should therefore be set to minimum brightness and used with a red filter.
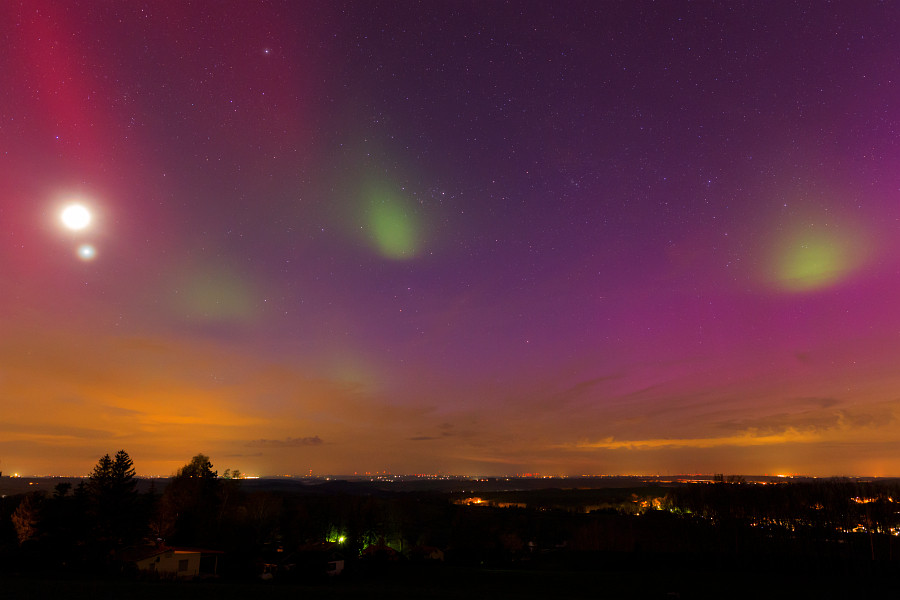
Pulsating green aurora (RAGDA) over the Elbe valley near Dresden on 23 April 2023 (photo: Heiko Ulbricht)
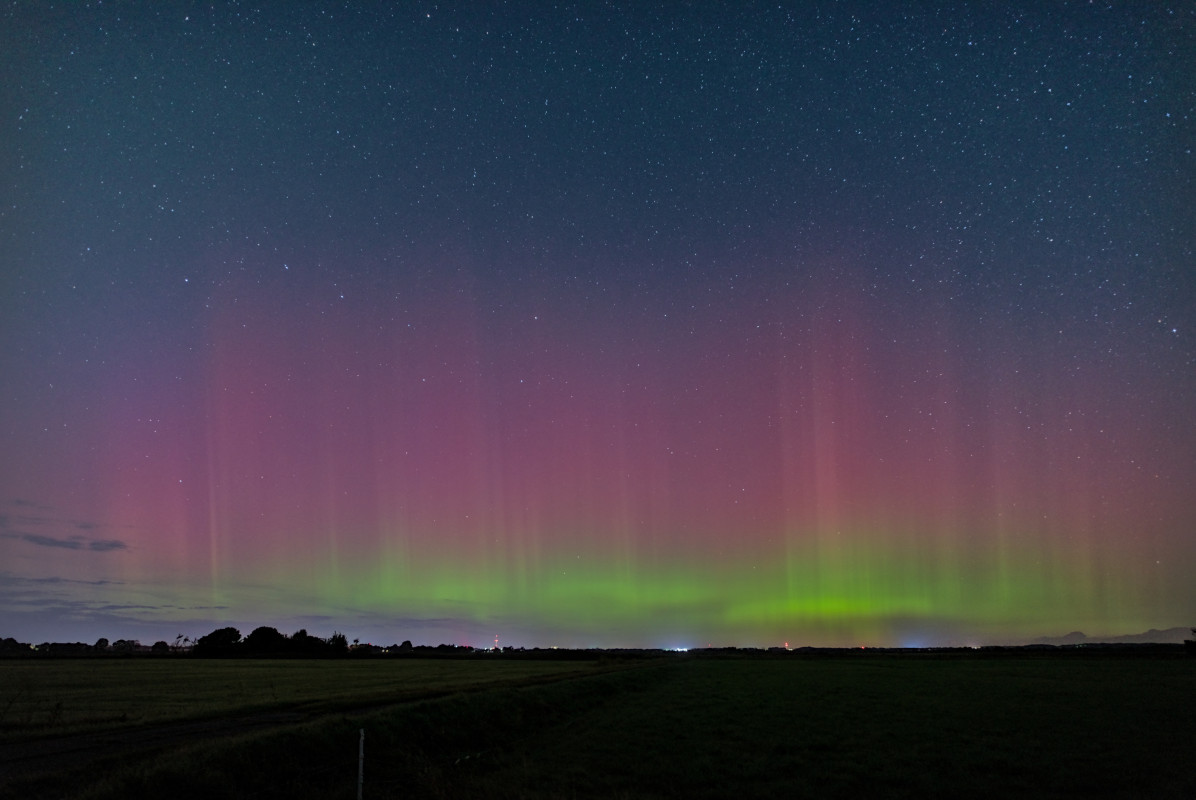
Aurora with rays at the Fieler Moor in Dithmarschen on 30 September 2025 (photo: Jörg Kaufmann)
Photography
Current smartphones offer a night mode with exposure times of several seconds. Placed on a solid surface or a small tripod, they already deliver meaningful images. During the great aurora in May 2024, a large share of the pictures was taken this way.
A camera with manual settings and long exposure times offers higher image quality. It is mounted on a tripod and pointed north. A remote release or the self timer prevents camera shake.
For focusing in the dark, the autofocus is switched off and the lens is focused manually in live view on a bright star, a planet or a distant light source. The setting then remains unchanged. A test shot serves as a check.
Recommended starting values:
- Focal length: 14 to 24 mm (wide angle)
- Aperture: as wide open as possible, for example f/2.8
- ISO: 1600 to 3200
- Exposure time: 5 to 15 seconds. Shorter for bright and fast moving aurora.
- File format: RAW for lossless post processing
The optimal values depend on camera, lens, moonlight and sky conditions. Continuous series with an interval timer are also recommended. This way no outburst is missed, visual observation remains undisturbed and a time lapse can be created later.
Documentation
Every observation from Germany is scientifically valuable. Besides the photo, the date, time, location, viewing direction and visual brightness should be recorded. Only then can an event be classified accurately later. Observations can be reported in the AKM forum and the aurora archive. Good pictures can also be submitted to the image archive.