Introduction
Halo phenomena that are clearly visible to the naked eye are always a great experience. However, sometimes some phenomena are so faint that they cannot be perceived. There are several reasons for this. Either the human eye cannot perceive the phenomena because they are very faint and not noticeable, or because we cannot perceive the colors so well. The latter is especially true for halo phenomena at night. At night, the eye adapts to the darkness in such a way that we can only perceive contrasts, but hardly any colors. Yet the camera is our third eye and often helps us detect phenomena that we would never have seen otherwise. Here, some image editing methods for digital photos are presented, which are used to make weak and rare halo phenomena visible.
Unsharp Mask
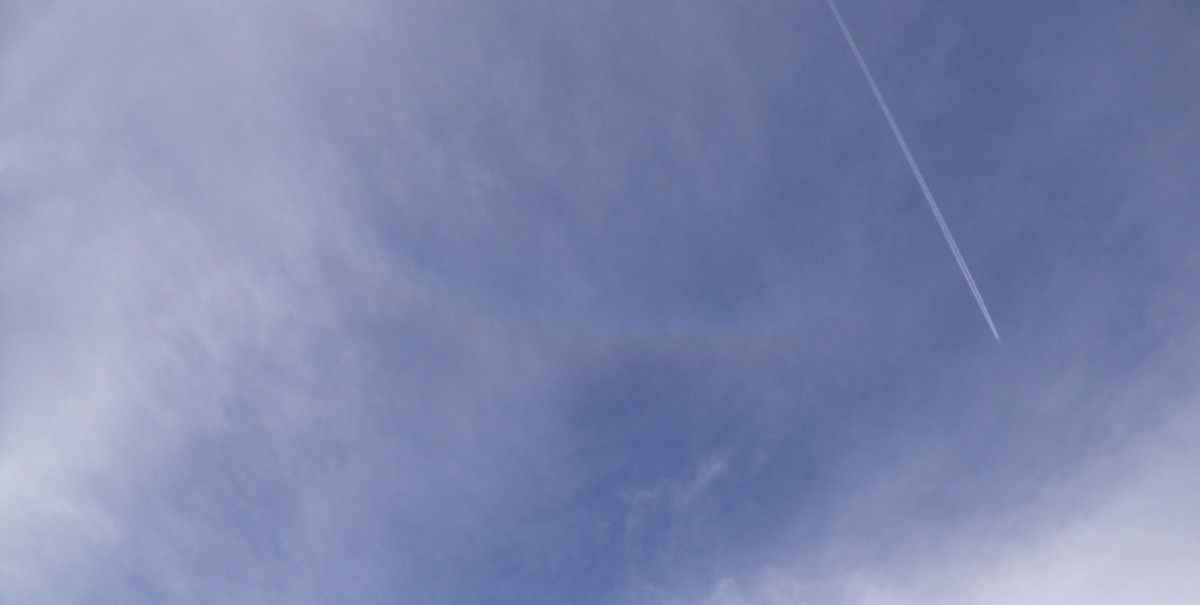
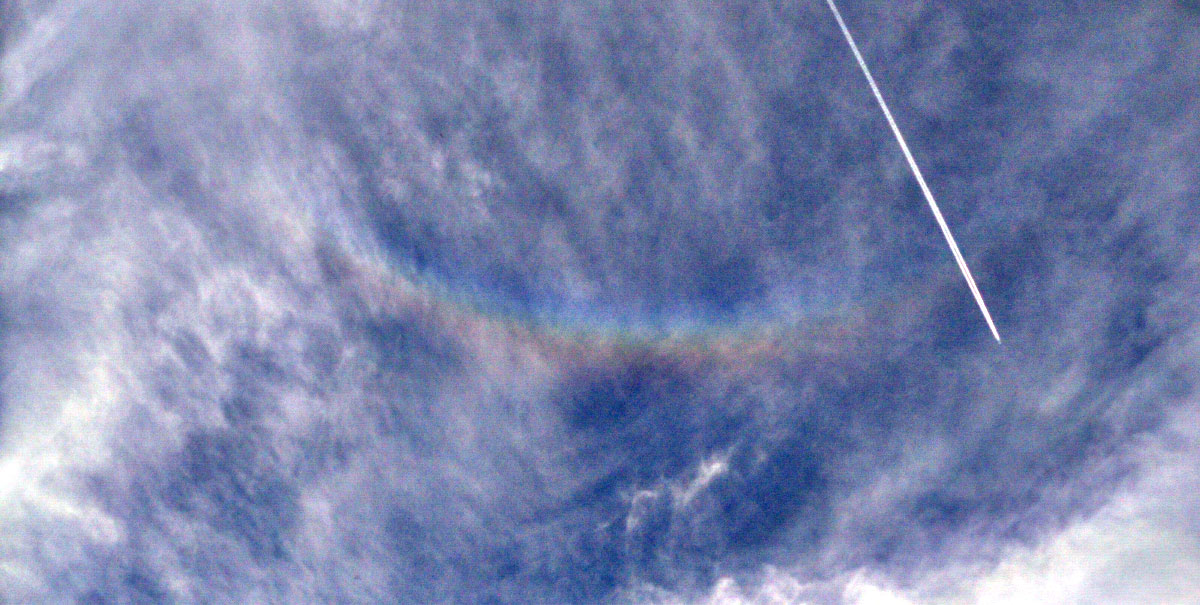
In the unsharp mask (unsharp masking, abbreviation: USM), the edges and lines of a photo are enhanced. This makes the photo appear sharper. This enhancement can also be overdone so that small contrasts are significantly enhanced. This advantage is used to make weak halo effects visible. The downside of this method, however, is that the natural character of the image is lost. Large high-contrast edges form around hard contours like trees or houses. For this, weak halos can now be identified.
Photoshop
- Filter => Sharpening Filter => Unsharp Mask...
- Settings
- Amount: 500%
- Radius: 50 pixels (Guide Value, Depends on Image Size)
- Threshold 0 Levels
GIMP
- Filter => Enhance => Unsharp Mask
- Settings
- Radius: 50 pixels (Reference value, depending on image size)
- Amount: 5
- Threshold: 0
RB Method
The RB method first became popular in spring 2013 when Michael Theusner presented his halo phenomenon from Bremerhaven . In the RB method, a color channel difference is created between the red and blue color channels.
An 8-bit RGB photo consists of 3 color channels: a red, a green, and a blue color channel. This is where the designation RGB (red, green, blue) comes from. In the RB method, the red color channel is subtracted from the blue color channel. The new channel created is logically black and white, as it contains no color information.
The RB method enhances halos that glow in spectral colors, but the special thing about the RB method is that the cloud contours disappear due to their colors.
Photoshop
- Image => Channel Breaking
- Settings
- Source 1: red
- Source 2: blue
- Mode: subtract
- Opacity: 50%
- Image => Adjust => Levels
- Settings
- Limit tonal range to 0 - 127 (move the right slider to 127)
- optionally, the image can be inverted (Ctrl + I)
GIMP
- Colors => Components => Channel Mixer...
- Settings
- Red: -200
- Green: 0
- Blue: 200
- The checkbox for "Monochrome" must be checked
The following photo by Michael Theusner shows the original image and the result processed with the RB method. You can clearly see how the cloud contours have disappeared and all types of halos gain clear structures. Especially the barely visible 22°-ring was greatly enhanced.


Bertram Radelow presented an addition to the RB method:
- If you subtract blue from red with a 10-pixel vertical shift, you can see the colored halos better. (See 2nd photo below: The Parry arc becomes clearly visible.)
- If you subtract color from color with a 10-pixel vertical shift, you can see the white halos better (See 3rd photo below: The horizontal circle is recognizable.)

Original Recording (Photo: Bertram Radelow)

Blue subtracted from Red (shifted by 10 pixels) (Photo: Bertram Radelow)
Oops, an error occurred! Code: 20260721225531b4e784c7
Stacking
Digital cameras inherently have noise. This means that the digital image has a grain. This grain can be more or less pronounced and arises due to skipping charges in the camera's sensor. The rule is: the warmer the temperature, the greater the noise in the image. The same applies to the ISO value. This value determines the sensitivity of the sensor to light. The higher this value is set, meaning the more sensitive the sensor is to light, the more pronounced the noise will be in the photo.
This noise can be compensated with a trick. You simply overlay several shots of the same subject and then add them up. This averages the noise in the shots and reveals more details. This process is called stacking. It is mainly used in astrophotography. Another advantage of the summation is that the clouds (since they move over time) blur and thus the contrasts in the sky are lower. This allows faint halos to become visible.
Procedure:
When you have different shots of the same subject, you must first ensure that the images align perfectly. For shots of halos or the starry sky, it means we must overlay the stars or sun precisely. As the Earth rotates, meaning the sun moves, the sky "distorts" in the shots over time and the stars become streaks. Therefore, all shots must first be aligned.
After alignment, you must overlay your shots. This can be done with various programs like "Regim", but also manually. For this, set the opacity of the 1st layer to 100% and change the opacity of the other layers proportionally.
Example:
- We have overlaid 8 shots
- Layer 1 is set to 100%
- All layers above get 13% opacity
- Calculation: 100% / 8 = 12.5% = ~13%
- In the end, all layers are merged into one single layer
That the stacking method in combination with the USM is a very powerful image editing method is shown by the following example from Andreas Möller. On the evening of 26.03.2013, he captured a very diffuse 22° halo and a 9° halo. From the overlay of 64 photos from a series and the application of the unsharp mask, new pyramidal halo types come to light.
Especially parts of the 18° halo and the 35° halo are clearly visible after editing.

Original photo of the pyramidal display on 26.03.2013 (Photo: Andreas Möller)

Stacked image from 64 individual shots + USM (Photo: Andreas Möller)
Conclusion
Image processing methods are interesting tools to make the non-visible visible. However, one should always ask:
- ... do I want to reproduce what I saw with my eyes?
- ... do I want to identify faint halo types more precisely?
- ... do I want to show a mood-filled image? Or ...
- ... do I want to tease out even the faintest phenomena from the image?

Original

Stack of 32 photos

USM

Stack + USM